

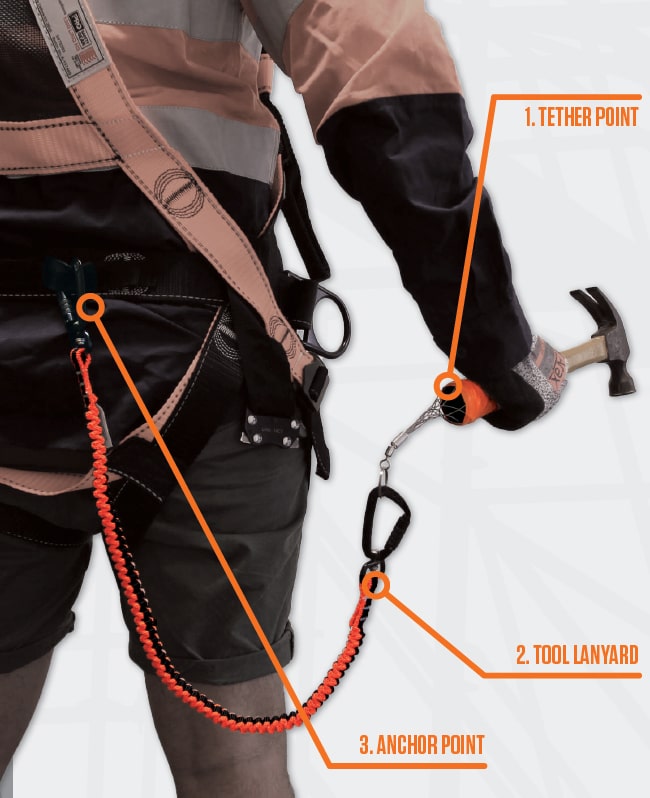
Tethering tools is as easy as one, two, three.
1. Tether Point
2. Tool Lanyard
3. Anchor Point
Here are the three components:
1. Tether Point
Begin with a tether point on the tool itself. As many tools don’t have an attachment point for a tool lanyard, LINQ have developed tether points that can be retrofitted to any tool without causing damage or limiting its use.
2. Tool Lanyard
There are different types of tool lanyards for different equipment, tasks and environments. It’s important to assess both your tools and where they’ll be used to decide which kind of lanyard is most suitable. You may want to have several types and lengths of lanyards to allow you to use your tools in various scenarios without any difficulty.
3. Anchor Point
The anchor point needs to be just as robust as the rest of the system. For lighter tools, they can be secured to a wristband, a work belt or to a harness worn by the worker. Heavier items should be tethered to a strong, fixed point such as a load rated rail or beam.
SELF FUSING TAPE
When using silicone tape – LINQ Recommends a minimum of two passes of the length of the tether
Certified Tool Anchor Points in THREE EASY STEPS
1. Cut a length of tape between 30cm - 40c (or enough to go around the tool at least 10 times).
2. Position the Tether Point on the tool.
3. Apply Self Fusing Silicone Tape, pulling it tight and without covering the Tether connection point.
NO HEAT OR ADDITIONAL PROCESS REQUIRED!